


使用腾讯邮箱stmp结合phpmailer实现发送邮件功能100%亲测可用
2025-04-22 09:43:12
SENxia.Me
A
+
A
-
今天给客户开发网站的时候,注册功能需要用邮箱接收验证码来实现注册,于是我用了腾讯的qq邮箱stmp来实现发送邮箱验证码功能。
我们使用开源项目:https://github.com/PHPMailer/PHPMailer
下载好源码后
打开代码SMTP.php PHPMailer.php
在第22行 删除代码 namespace PHPMailerPHPMailer;
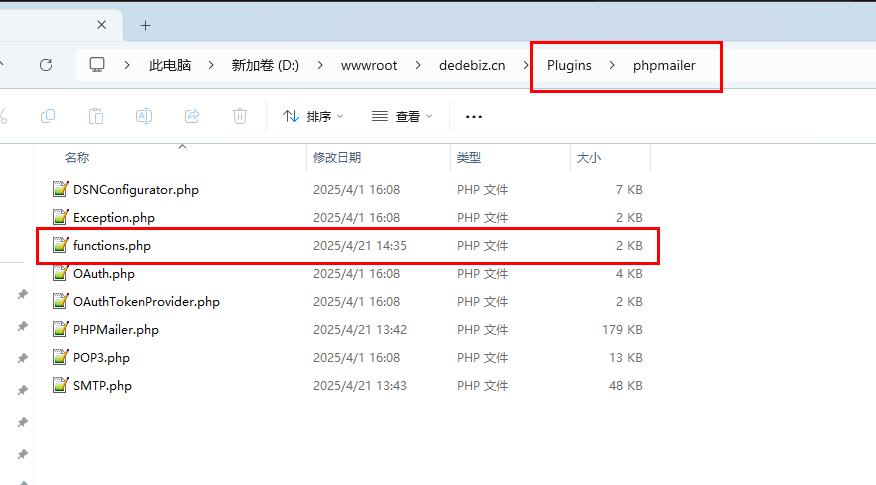
比如我在根目录新建文件夹plugins 把phpmailer拷贝进去,如图所示

新建一个functions.php文件,代码如下:
<?php
/*发送邮件方法
 *@param $to:接收者 $title:标题 $content:邮件内容
 *@return bool true:发送成功 false:发送失败
 */

function sendMail($to,$title,$content,$email_config){
    //引入PHPMailer的核心文件 使用require_once包含避免出现PHPMailer类重复定义的警告
	require_once("PHPMailer.php");
	require_once("SMTP.php");

	//参数分解
	$email_host = $email_config['cfg_smtp_server'];
	$email_port = $email_config['cfg_smtp_port'];
	$email_fromname = $email_config['cfg_smtp_username'];
	$email_from = $email_config['cfg_smtp_usermail'];
	$email_username = $email_config['cfg_smtp_user'];
	$email_password = $email_config['cfg_smtp_pwd'];

	$mail = new PHPMailer();
	$mail->isSMTP();

	//Enable SMTP debugging
	//SMTP::DEBUG_OFF = off (for production use)
	//SMTP::DEBUG_CLIENT = client messages
	//SMTP::DEBUG_SERVER = client and server messages
	$mail->SMTPDebug = SMTP::DEBUG_OFF;  //邮箱调试模式
	$mail->Host = $email_host;  //SMTP服务器
	$mail->Port = $email_port; //SMTP服务器端口
	$mail->SMTPAuth = true;
	$mail->Username = $email_username;  //SMTP服务器邮箱账号
	$mail->Password = $email_password;  //SMTP服务器邮箱密码
	$mail->setFrom($email_username, ''); //发送名
	$mail->addReplyTo($email_username, ''); //发送名
	$mail->addAddress($to, ''); //接收邮箱账号
	$mail->Subject = $title; //邮箱主题
	$mail->msgHTML($content);  //邮箱内容
	//简单的判断与提示信息
    if($mail->send()) {
        return true;
    }else{
        return false;
    }
}
?>
然后在任意php文件中发送邮箱动作
// 获取网站根目录
$rootDirectory = $_SERVER['DOCUMENT_ROOT'];
// 拼接要引用的文件的完整路径
$filePath = $rootDirectory . '/plungins/email.php';

require_once($filePath);

$userid = 123456@qq.com //接收的邮箱
$this_email_title = "邮箱验证码"; //邮箱主题
$this_email_content = "您的验证码为:45678"; //邮箱内容
$email_config = [
  'cfg_smtp_server' => 'stmp服务器',
  'cfg_smtp_port' => 'stmp服务器端口',
  'cfg_smtp_username' => '发件人名称',
  'cfg_smtp_usermail' => '发件人邮箱',
  'cfg_smtp_user' => '发件人账号',
  'cfg_smtp_pwd' => '发件邮箱stmp授权码'
];
$sms_code = sendMail($userid,$this_email_title,$this_email_content,$email_config);
这样就可以自动发送邮件啦!
如需转载请注明出处。
本文地址:https://www.senxia.me/php/7.html


Copyright © 2025 www.senxia.me 版权所有


返回顶部